Thursday, July 21, 2011

Cucumbers and Cream Pops: what the what?!?!


Yeppers, you read that right. Cucumbers and cream pops. 

In Northern Kentucky it has been HOT this month. We have been held captive by the sun and we are restless hostages.


So one scorching afternoon I wanted to make a cold treat and saw three beautiful cucumbers on the kitchen counter looking very summarily.

Ingredients:
3 cucumbers (or more if you LOVE that fresh taste)
1 can of sweetened condensed milk
3 tbs. lemon juice (add more or less to taste)


Peel, de-seed, and puree 3 (or more to taste) cucumbers.


Wisk the puree with 1 can sweetened condensed milk and 3 tbs. of lemon juice (more or less to taste). 


Pour into some paper cups and place cups onto baking sheet or baking dish to keep level.


Allow random 3 year old to assault your pops with sprinkles. We choose green and blue to make an Earth theme.


Put in freezer for a few hours and when they get a little firm you can add your sticks. 


Remove the paper cup and ENJOY! My husband and son HATED them. But me and my Olivia loved them. They have that summer garden taste with the sweet taste you want from a cold treat. 


Find us on facebook:


We are partying with these crafty gals!


A Glimpse Inside


36th Avenue


Join  us Saturdays at tatertotsandjello.com for the weekend wrap 
 up           party!


Funky Junk Interiors


Friday, July 8, 2011

Natural and Macgyver-ish way to get rid of fleas!


I love the summer but HATE the flea season. We only have one pet, and his name is Uncle Harvey. Thanks to Uncle Harvey and from what I read, a VERY BAD year for fleas. We had a itchy problem a few weeks ago.


So here is my mini tutorial on a DIY flea trap.


1. Get a plate, old cooking sheet, etc. As long as it is flat and has a good amount of surface area to catch your fleas, it will work.


2. Fill with water and place on the floor near where your pet hangs out.


3. Use any kind of dish liquid and squirt a good amount onto the water. No need to mix.


4. Create a light source. You can set this under a night light, fix a flash light to a mini tri-pod and angle the light to the water, or use a little stand and put a flame less candle on it. It doesn't matter as long as the light source is the yellow-ish type of light. Fleas only attack to the yellow glow. 


5. Set this out when you go to bed and make sure all other light sources are turned off.


The fleas will think the yellow glow/warmth is a meal. They will jump to the light and land in the water. The dish soap will create a resistance in their swimming to the edges and drown them. 


Done-zo!


This is meant for minor infestations, if your flea problem is too far gone than this might not help.


We used this trick every night for a week or two in addition to putting Uncle Harvey outside (he's an outside cat anyways), and washing EVERYTHING the fleas could have laid eggs on.


Hope this helps! It is a AWFUL problem and kind of embarrassing but we are flea free now!


We forgive you Uncle Harvey! We have had you since 2001 and won't get rid of you over some stinky fleas.


We are partying!


Posted by Picasa

She's an old hippy! Making watering cans by recycling.

I am attempting to do this blog with as few words as possible.  So don't forget to check us out on facebook;  Poor Badger Creations. Thanks for reading the new blog and no words starting.....NOW!


We are partying!


Photobucket


Posted by Picasa

Tuesday, July 5, 2011

Some 4th of July food for thought


I love holidays! Especially when you get to enjoy food, family, fireworks, and celebrating our beautiful country. 

So this blog is short and SWEET!


Popcorn poop:
*1 stick of butter melted
*1 bag of marshmallows melted and mixed with the butter
*TONS of popcorn
*1 large bag of M & Ms

Melt and mix. I was inspired by the Cookies and Cups popcorn cake. Ours is just a pile of YUM! Not the prettiest but OHHH BOY!


Apple Pies on a Stick:


This one is easy peezy. 

Ingredients:
*pre-made pie filling
*apple pie spice
*pre-made pie crust
*sugar
*bamboo skewers
*egg yolk

(can you tell I shop at a certain store and buy generic?)

Preheat to 350 degrees. Cut little circles out of pie crust (I used a cup as a cookie cutter). Spoon on pie filling and lay skewer on. Cut a second circle and lay on top. Mix egg yolk and a dash of water to give the outside an egg bath. Sprinkle on some sugar mixed with apple pie spice. Use a fork to flute the edges.


Bake until crust is cooked and DONE!


With an election year looming lets remember to keep some of the abundance of pride we feel on the 4th and be civil to others we may not agree with politically. Try to remember what we tell our kids: treat others how you want to be treated. Just food for thought.  Thanks for reading!
God bless America! 


Find us on Facebook here:


Monday, June 27, 2011

*SOAP MONSTERS* Tutorial


Here is a craft that is toddler and tired mommy friendly. We have a 2 year old son and a 3 year old girl and they LOVED this. Plus our poor wallets loved the price too.


Easy to find supply list:
soap (any kind, but I used glycerin for a easy cut)
glue (regular old white glue will do)
pen
knife
some google eyes


When dealing with toddlers who can pick a fight about whose 'whatever' is whose, I went ahead and drew a O for Olivia and a C for Cody on the back. Toddlers!


Then just give your little sculptor a pen and let them draw their creature on the soap. For an older kid this could be a very cool piece of art, mine just went bananas. 


If your kids are young like mine, you'll have to do this step yourself.  Just interpret the monsters shape and cut it out. The glycerin soap was sooo easy to cut. If you have an older kid this could be done by them with a butter knife.


All cut out! The kids REFUSED to have their picture taken during this craft. Not even the bribe of marshmallows and hot cocoa could persuade them.


Glue some eyes on and get your monster play going. Being a gal who HATES wasting, I just clumped up the extra soap and used it for hand washing at the kitchen sink. Us poor badgers waste not and want not.  =)


Thanks for reading!

Find us on Facebook here:


I'm partying with these crafty gals:


Thursday, June 23, 2011

Yo-yo nuts: how one yo-yo sparked my sewing insanity. (tutorial)


                            My first encounter with a yo-yo was an old blanket my mamaw had. It was a hundred or more of these beautiful yo-yos stitched together making a blanket with colors, textures, and patterns in a fanciful design.


                           So here is my tutorial on the yo-yo for those who may not be familiar with this sewing staple.


First start with a small swatch of fabric. Find something to create your pattern on, I just used a throw away plate.  Trace and cut out.


If you've read a few of my blogs this fabric might look familiar to you. HERE is the blog it came from.


Anywho....


Cut the circle out and hand stitch a running or basting stitch the whole circumference of the circle. Make sure you don't tangle the thread.


This is what it looks like after you apply the stitch. Now it is time to GENTLY tug the thread.


Now you will have this little pouch. Primp it into shape and tie it off at the end.


And there you go! 

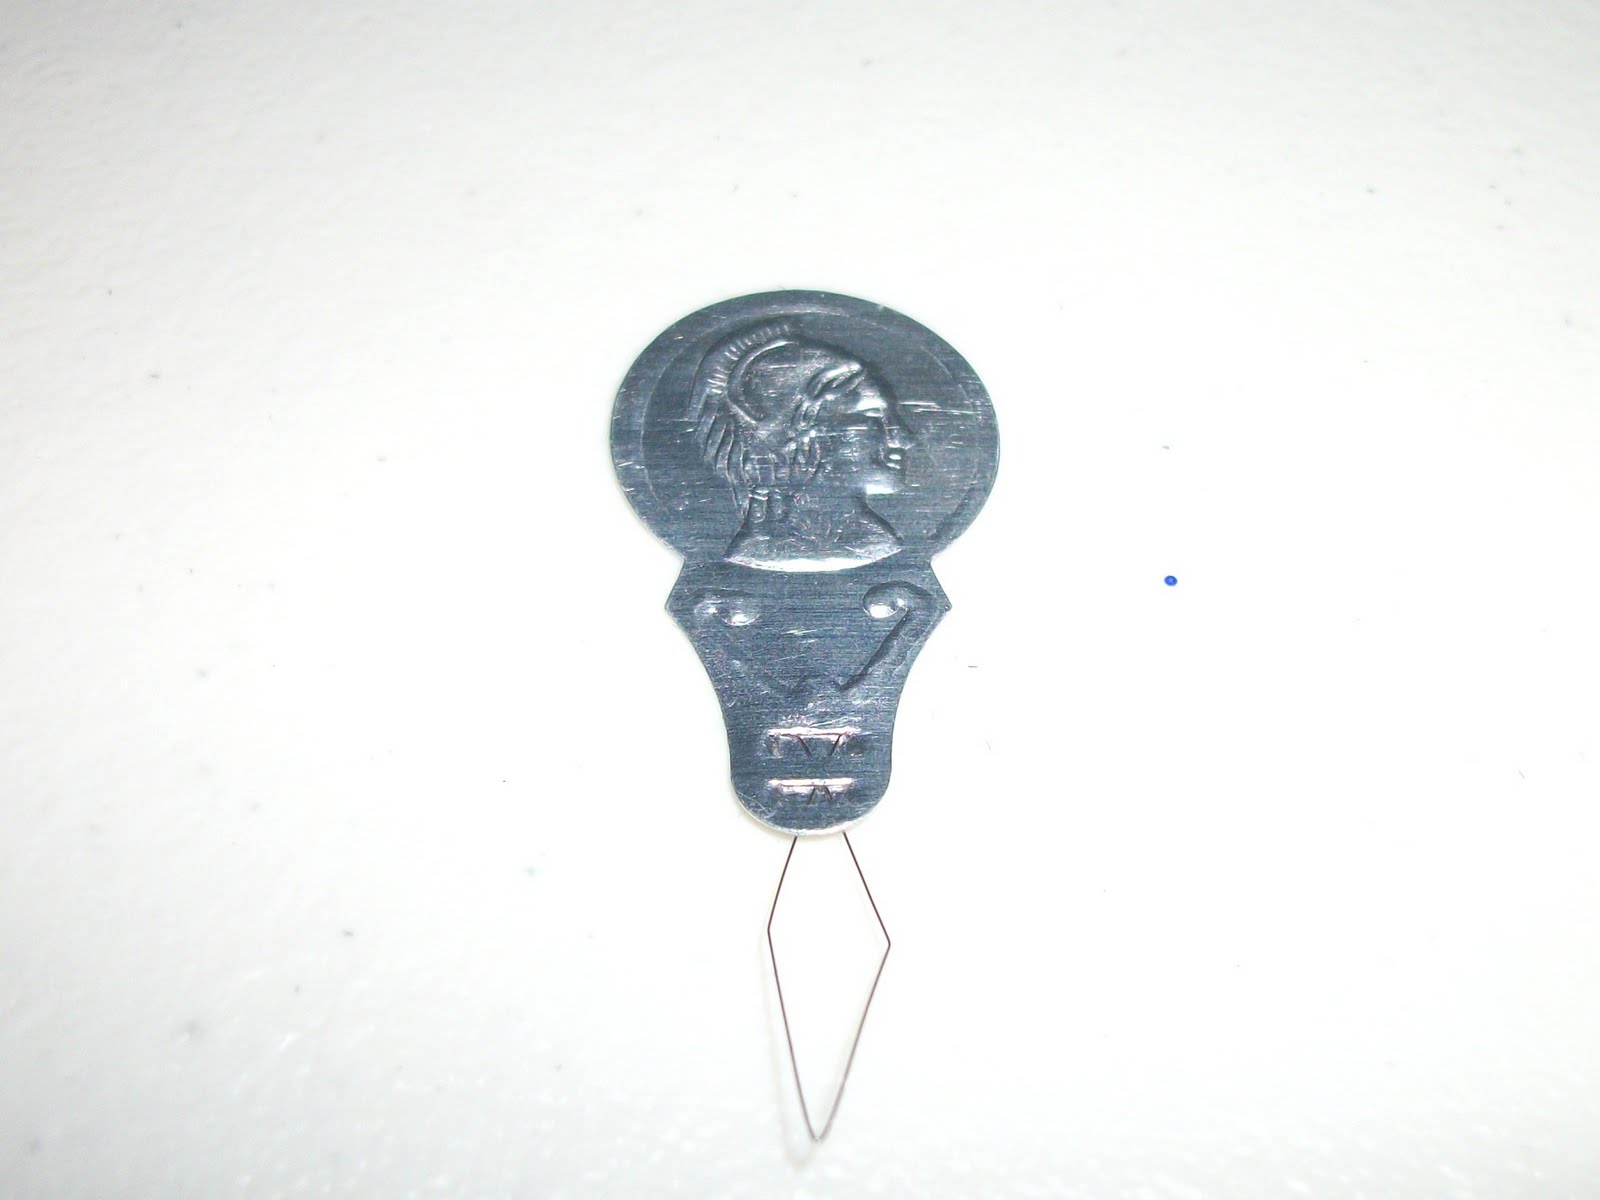
By the by...hand sewing is usually avoided because some find it hard to thread the needle. I knew how to hand sew and machine sew for awhile before I figured out what this little fellow was:


I had NO CLUE this was a needle threader. So if you are reading this and had no clue either, don't feel bad.    ;)


All you do is push the flexible wire through the needle eye and put one end of the thread through the wire. Then pull the flexi wire and thread through the eye. I have to give a big *praise the Lord and pass the biscuits* to this invention. 


Rambling, sorry. Back to the yo-yos. Here is my pile I made in one afternoon:


These little cuties have a 101 uses. But these specific ones were made for the locks of my special brown headed badger.


Using the yo-yos and a few extra crafting materials I made these:


She is SO happy I am including her BFF Cheetah in the blog. 


Here are some pink yo-yos I made and Cheetah sneaks in my picture again!


I will have a few more blogs showing the MANY uses of this awesome sewing project.


Find us on facebook here:


I am partying with these awesome crafty gals: