Saturday, October 1, 2011

DIY: Yard Reaper


Time for another Poor Badger Halloween tutorial.
I have always gave credit to Ms. Martha Stewart for being the bottom line Queen of Halloween, but this year I am aiming hard for at least the Duchess of Doom title. 


Like all of my projects this one was very easy and VERY CHEAP.


Our Out-Let store had this costume for $4.95, so it was a SCORE!


I found a wonky ball from my tots room that made a perfect head, a few swipes of some cheap Folk-Art acrylic paint in red and this monster had some snazzy peepers. 


Since the costume was a kids costume, our yard reaper was only 4 or 5 feet tall. If you wanted taller, you could get an adults costume or sew yourself a black robe. 

We used an tomato stick and stuck it into the ground a few inches for stability. Then a few feet of chicken wire (which can be bought at a feed store or Lowes) framed the little fellers body so he could be dressed. 


Some wire ties helped hold the whole shabang together. God bless wire ties!


We dressed our newest yard member and had him point the way to our spooky plots. 


More spooky crafts to come!


I'm haunting these parties:


Monster Mash Bash


Photobucket


Come Together Kids

Friday, September 23, 2011

Clock from HECK!


Oh it feels SO good to back blogging! I have missed my readers, the ladies who I enjoy reading, and the craft community in general. So lets hop to it bunny rabbits!

October is among us and the Poor Badgers LOVE some creepy crafts. This one is Poor Badger no/low budget approved.


Get a cheap clock. Dollar tree, Dollar Store, your closet, or the outlet stores are a good place to look. We got this at our Outlet store for 99 cents because the vinyl cover was scratched and broke. SCORE!


Some basic acrylic paint. Wal-Mart has folk art for a BUCK!


Now remove the cover, this wasn't too hard. Paint the clock face black or red, then paint your numbers on. Don't forget the spookiest hour of all....13!


Now you have a spooky clock for your trick or treaters or a nice inside decoration. This was beyond simple and something your older kids could easily do themselves. 


We have many more spooky blogs to come, so you can have your yard just as wicked as ours. We are hoping through Facebook and word of mouth to have people come see our haunted yard and bring us a can of food. The Holidays are around the corner and many churches, libraries, and schools will be having food drives to make food baskets. This is a fun and spooky way to help out our brothers and sisters! 


Proverbs 19:17
He who is kind to the poor lends to the LORD, and he will reward him for what he has done.


You can find my blog with these awesome crafters!


Join  us Saturdays at tatertotsandjello.com for the weekend wrap 
 up           party!


Monster Mash Bash


Photobucket


Come Together Kids

Tuesday, July 26, 2011

Kiddie crack: homemade pixie sticks!


Yeah, you heard me. The stuff of  parents nightmares and drug of choice for all kids. The candy white pony. 

PIXIE STICKS!

This is fun, simple, and a ONCE in a while thing. 


Start with a straw and something to melt the ends. (I quit smoking over 4 months ago so all I had was matches and they made the ends kinda yucky brown. YEA ME for quitting smoking!)


Of course you need sugar, but you can get pretty experimental with the rest of the ingredients. Here are some ideas:

jello mix
kool-aid packets
cotton candy sugars
any type of extract and food coloring

I did not want to make a trip to the store so I used what I had.


Add whatever ingredients you choose in a ziploc bag.


Then mix like your life depends on it! Since we used two wet ingredients ours took quite some time to mix (half an episode of the smurfs).

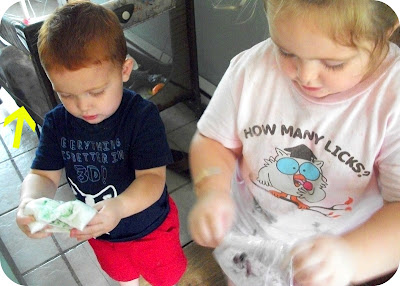
*Look at the poor baby in the crib wanting to be included with the older two! When I edited this pic I almost cried when I saw her watching us.*  :(


This is what you end up with. Our sugar is kinda moist like brown sugar, but if you only use dry ingredients like the kool-aid or jello you will have a powdery mix.


Now you need to get you pixie mix into the straw, I used a cake decorating tip and a toothpick to get mine in. 

Now close the ends up and let the kids go NUTS!


Enjoy those sugar highs kids!


We are partying!


lil luna link party button


Join  us Saturdays at tatertotsandjello.com for the weekend wrap 
 up           party!


Photobucket


Thursday, July 21, 2011

Cucumbers and Cream Pops: what the what?!?!


Yeppers, you read that right. Cucumbers and cream pops. 

In Northern Kentucky it has been HOT this month. We have been held captive by the sun and we are restless hostages.


So one scorching afternoon I wanted to make a cold treat and saw three beautiful cucumbers on the kitchen counter looking very summarily.

Ingredients:
3 cucumbers (or more if you LOVE that fresh taste)
1 can of sweetened condensed milk
3 tbs. lemon juice (add more or less to taste)


Peel, de-seed, and puree 3 (or more to taste) cucumbers.


Wisk the puree with 1 can sweetened condensed milk and 3 tbs. of lemon juice (more or less to taste). 


Pour into some paper cups and place cups onto baking sheet or baking dish to keep level.


Allow random 3 year old to assault your pops with sprinkles. We choose green and blue to make an Earth theme.


Put in freezer for a few hours and when they get a little firm you can add your sticks. 


Remove the paper cup and ENJOY! My husband and son HATED them. But me and my Olivia loved them. They have that summer garden taste with the sweet taste you want from a cold treat. 


Find us on facebook:


We are partying with these crafty gals!


A Glimpse Inside


36th Avenue


Join  us Saturdays at tatertotsandjello.com for the weekend wrap 
 up           party!


Funky Junk Interiors